If you’ve been looking to enhance your mechanical skills, learning how to create a DIY gear box is an incredibly rewarding project.
What Is a DIY Gear Box and Why Build One?
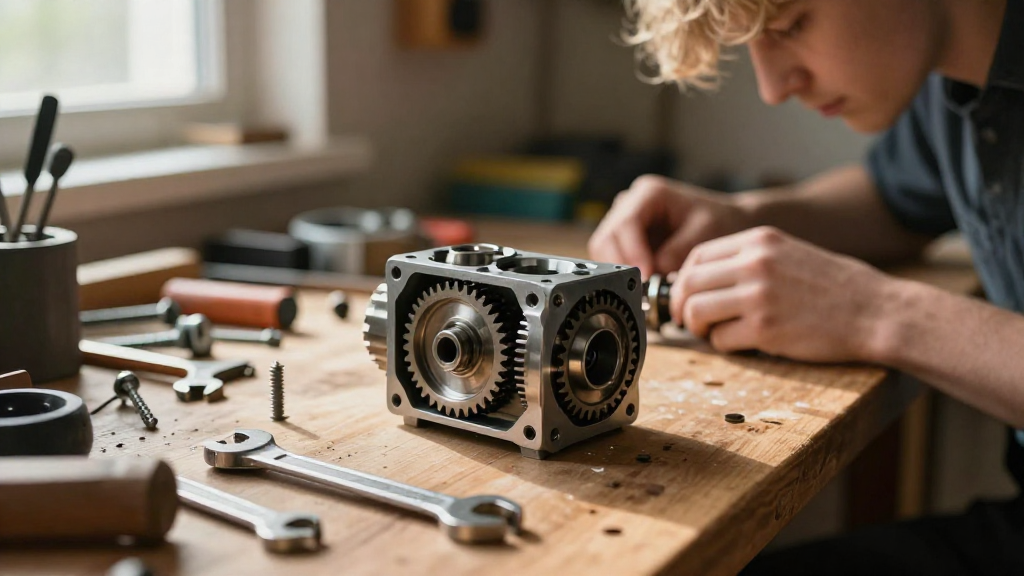
A DIY gear box is a mechanical device that transmits power through gears, allowing for changes in speed and torque.
Building your gear box can give you insights into mechanical engineering principles.
It can also help you:
- Enhance your problem-solving skills
- Gain hands-on experience with tools
- Create custom solutions for projects
What Tools Do You Need for a DIY Gear Box?
Before diving into your DIY gear box project, gathering the right tools and materials is crucial. Here’s a list of essential tools you’ll need:
-
Tools
– Wrenches (various sizes)
– Screwdrivers (flathead and Phillips)
– Pliers
– Drill and drill bits
– Saw (hacksaw or band saw) -
Materials
– Gears (plastic or metal)
– Housing (aluminum, wood, or plastic)
– Bearings
– Shaft
– Fasteners (screws, nuts, bolts)
– Lubricant (for smooth operation)
How to Design Your DIY Gear Box?
Designing your DIY gear box is vital for its success. Here are steps to guide you through the design phase:
Step 1: Determine Purpose
Ask yourself:
- What is the purpose of the gear box?
- What type of gear ratios do you need?
Understanding your project’s requirements allows you to select the right gears and sizes.
Step 2: Sketch Your Design
Sketching out your design can make it easier to visualize the project.
Make sure to include:
- The arrangement of gears
- Size of the housing
- Shaft placement
Using design software can help, but even a simple hand-drawn sketch will suffice.
Step 3: Select the Right Gears
Choosing the right gears is essential for achieving the desired mechanical advantage.
Here are some types of gears you can consider:
- Spur Gears: Simple gears mounted on parallel shafts.
- Bevel Gears: Gears that can change the angle of rotation.
- Worm Gears: Ideal for large speed reduction.
How Do You Assemble a DIY Gear Box?
Once you have your design and materials ready, it’s time to assemble your DIY gear box!
Step 1: Prepare the Housing
- Cut the housing materials according to your design dimensions.
- Drill holes for shafts and bearings if necessary.
Step 2: Install the Gears
- Begin with the input gear and secure it to the shaft.
- Align subsequent gears as per your design.
- Ensure that all gears are adequately meshed.
Step 3: Add Bearings
- Insert the bearings to support the rotating shafts.
- This step will significantly reduce friction and wear.
Step 4: Secure Everything
- Use bolts, screws, or nuts to secure all components tightly.
- Don’t forget to periodically check your alignment and tightness.
Step 5: Lubricate the Gears
- Apply a suitable lubricant to ensure smooth operation.
- This step is often overlooked but critical for longevity.
How to Test Your DIY Gear Box?
After assembling, it’s crucial to test your DIY gear box to ensure it works as intended.
-
Initial Test:
– Rotate the input shaft manually.
– Check for smooth movement without obstruction. -
Power Test:
– Connect a motor or handle to the input shaft.
– Observe if the output behaves as expected. -
Monitor Temperature:
– Run the box for a few minutes.
– Feel for excessive heat, which could indicate friction issues. -
Adjustments:
– Make necessary adjustments based on your test results.
– Don’t hesitate to disassemble and reassemble if something isn’t right.
What Are Common Mistakes in DIY Gear Box Projects?
While working on your DIY gear box, be aware of frequent pitfalls that can lead to malfunction.
-
Incorrect Gear Ratios:
– Poor calculations can lead to inadequate torque or speed. -
Misalignment:
– Ensure that gears are properly aligned; misalignment can cause gear wear or breakage. -
Lack of Lubrication:
– Neglecting lubrication will lead to increased friction and premature failure. -
Skipping Tests:
– Testing is essential to ensure functionality; never skip this step!
How to Maintain Your DIY Gear Box?
Maintaining your DIY gear box is essential for longevity and performance.
Here are some tips for proper maintenance:
- Regular Lubrication: Schedule periodic checks and reapply lubricant as necessary.
- Inspect Gears: Regularly examine the gears for signs of wear or damage.
- Check Alignment: Periodically verify that all parts remain aligned.
- Clean Components: Dust and debris can hinder performance. Keep everything clean.
Conclusion: Is Building a DIY Gear Box Worth It?
Creating a DIY gear box is not only about the end product but the learning experience and skills you build along the way.
From understanding mechanical principles to enhancing problem-solving capabilities, this project brings immense value.
So, gather your materials, plan your design, and dive into making your own gear box.
It’s a project that opens up a world of possibilities, whether for use in vehicles, machinery, or robotics.
FAQs
Q: What materials are best for my DIY gear box?
A: Using durable materials like aluminum or high-strength plastic ensures durability and longevity.
Q: How complex is the gear box design process?
A: The complexity varies depending on your project’s requirements. Start simple, and gradually work your way up!
Q: Can I use recycled materials?
A: Absolutely! Repurposing old gears and housings can make your project environmentally friendly and cost-effective.
By following this guide, you are well-equipped to build your own DIY gear box successfully. Happy building!